No website, no problem. We create a unique link for each of your products so that you can immediately share & sell on social, in email, or anywhere else you can share a link. Here's an example.

We'll automatically generate a beautiful preview for Twitter and Facebook.


If you've already got a website or blog you can use our embeddable buy now buttons. These can be added to any website, including those created with a popular website builders like Squarespace, Webflow, or WordPress:
Add the following script to your website, ideally before the closing </body>. If you're using a website builder, see below for details.
Add a product link wherever you'd like a buy now button to appear:
By default, we include a simple CSS class that adds some basic styles to your buy now button class="simple-goods-button". You can remove this and add any class you'd like or apply your own styling.
Enabling Test Mode for a product allows you (or others) to run through the entire checkout experience using a test credit card, instead of a real one.
By default, when you create a new product it will be in test mode. When you're ready to go live, you can turn this off (see toggle at top right when editing any product) and begin accepting charging credit cards.

Below is a list of test credit cards you can use when your product is in test mode. Note that for the expiration, any future date is valid. For the secrity code or CVC number, any 3-digit number is valid.
For a full list of test cards you can use, see Stripe's testing guide.
When buying a subscription product that has a trial period in test mode, we set the trial period to 2 minutes to make testing failed payments and renewals super easy.
Just made an update to your digital product?

Simply check the box that says "Send Update To Previous Buyers?" and we'll automatically let past buyers know. We'll send an updated download link to the newly updated product and we'll reset their downloads as well.
Updates just got simple!
With the return URL feature you can send customers to a special page directly after checkout (free or paid).
We support a number of currencies for your products and subscriptions. This makes selling products in your local currency a snap and is huge for boosting sales.
Using the theme accent color option you can quickly match the styling of the Simple Goods checkout flow to your site or brand:
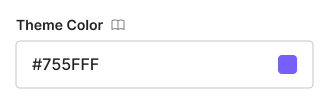
This will change the color of the checkout buttons and form highlights
Simple Goods integrates tightly with Stripe to allow you to accept credit cards and deposit your earnings directly into your bank account. Stripe is currently supported in a number of countries and is free to signup.
To get started with Simple Goods and start accepting credit cards:
That's it! You'll be accepting credit card payments in no time.
With our Mailchimp integration it's simple to add your customers' email address and product purchased to your existing email lists after each sale.
Connecting your Mailchimp account to Simple Goods is a snap:
Simple Goods can send the name of the product that was purchased to Mailchimp after each sale.
You can use this to segment your email list further by sending emails only to customers that purchased a specific product or version of your product. In order to collect this info however you'll need to add a custom merge tag inside of Mailchimp:
That's it. We'll automatically start sending the name of the product purchased to Mailchimp to be added in your email list.
Zapier let's you connect all the tools you use and love together – without any code. For example, after each sale you could add customer details to a spreadsheet, send yourself a text notifiction. The possibilities are endless. 1000's of integrations with Simple Goods are made possible with Zapier.
Setting up and enabling Zapier via webhooks is simple. To get started:
We provide webhooks for common events like charges and subscriptions. If you're unfamililar with webhooks, think of them as simple notifications whenever a specific action happens. They are incredibly useful for integrating with other services and systems.
Generally speaking, to integrate our webhooks with your website or app, you'll need some technical skills to handle the incoming webhooks and to do something with them (such as create a new user, add in-game credits to an account, etc). However if you're not technical or don't have access to a developer you may want to check out our Zapier integration instead.
We send webhooks for the following events:
Below is an example of a JSON payload we send each time a sale is completed: